Faux finishing is a term used to describe a wide range of decorative painting techniques that are used to create the illusion of a more expensive finish. Faux finishes can be used on walls, ceilings, furniture, and even floors.
There are three basic stages to creating a faux finish: basecoating, glazing, and topcoating. Basecoating is the first stage and involves applying a base color to the surface that will be faux finished. This base color will show through the glazes and topcoats, so it is important to choose a color that you are happy with.
How long to let stain dry before poly
After the base coat is dry, the next stage is glazing. Glazing is a technique that uses thin layers of paint to create depth and dimension. It is important to use a glaze that is compatible with the paint you are using for the basecoat. Once the glaze is applied, it should be allowed to dry completely before moving on to the next stage.
The last stage is topcoating. Topcoating is a layer of paint that is applied over the glaze. This layer can be either clear or tinted. Tinted topcoats will add color to the finish, while clear topcoats will protect the glaze and allow the basecoat color to show through. Once the topcoat is dry, the faux finish is complete!
Faux finishing is the process of creating a textured surface on walls or furniture
The three basic stages of faux finishing are basecoating, glazing, and topcoating. Basecoating is the first stage and involves applying a base color to the surface that will be faux finished. This base color will show through the glazes and topcoats, so it is important to choose a color that you are happy with.
After the basecoat is dry, the next stage is glazing. Glazing is a technique that uses thin layers of paint to create depth and dimension. It is important to use a glaze that is compatible with the paint you are using for the basecoat. Once the glaze is applied, it should be allowed to dry completely before moving on to the next stage.
There are three stages to faux finishing – preparation, application, and finish
Preparation is the most important stage as it ensures that the surface to be painted is ready to accept the paint and glaze. Application is the second stage and involves applying the basecoat, glaze, and topcoat. Finish is the last stage and involves adding a final coat of paint or varnish to protect the faux finish.
Faux finishing is a term used to describe a wide range of decorative painting techniques that are used to create the illusion of a more expensive finish. Faux finishes can be used on walls, ceilings, furniture, and even floors.
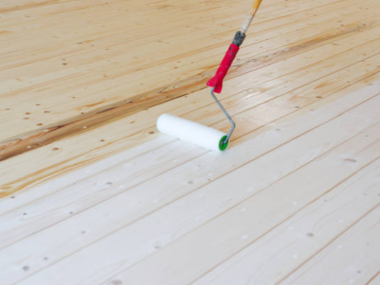
Application can be done with a brush, roller, or sponge
The paint can be applied in a variety of ways to create different effects. Glazing is the second stage of faux finishing, and involves applying a thin layer of paint over the basecoat. This layer of paint creates depth and dimension.
The last stage of faux finishing is topcoating. Topcoating is a layer of paint that is applied over the glaze. This layer can be either clear or tinted. Tinted topcoats will add color to the finish, while clear topcoats will protect the glaze and allow the basecoat color to show through. Once the topcoat is dry, the faux finish is complete!
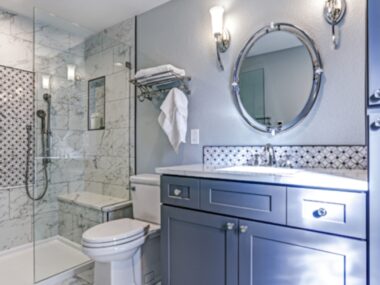
Finish can be either matte or glossy depending on your preference
The final stage of faux finishing is to add a coat of paint or varnish to protect the finish. This final coat can be either matte or glossy, depending on your preference. Matte finishes are more durable and easier to clean, while glossy finishes have a higher sheen and are more susceptible to scratches and fingerprints.
Faux finishing is a great way to add depth and dimension to your walls or furniture. With a little bit of patience and practice, you can create a beautiful finish that will last for years.