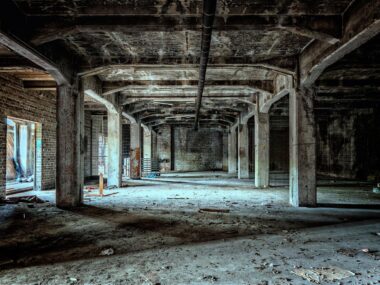
Painting. It’s something people treat it like a weekend errand. A couple cheap rollers, a couple cans of paint, an old flannel shirt. A couple hours of easy work and the job is done. It has nothing to do with a real paint job, though.
Usually people don’t even think about vital parts of the process. Layers, timing, surface behavior — things that don’t show up until they go wrong. And they always go wrong the same way. Predictable, almost boring, if you’ve seen enough houses.
Out here in LA, teams like Mr. RAROV Painting run into the same issues every week — peeling paint, uneven walls, finishes that looked fine for about three months and then just gave up. This guide isn’t theory. It’s about what actually fails on-site. And how to avoid painting mistakes before they cost you time, money, and patience.
Because most painting mistakes homeowners make aren’t accidents. They’re skipped basics.
Mistake #1: Skipping Surface Preparation
This is the big one. The one that ruins everything quietly.
Issue: People jump straight into painting without proper surface preparation for painting. No cleaning, no sanding, no filling gaps. Just paint over whatever’s there.
Why it happens: Prep work feels slow. And honestly, it is. But skipping it creates a weak foundation. Dirt, grease, glossy finishes — they all block proper paint adhesion.
What goes wrong: You get peeling paint, bubbling, uneven texture. A bad paint job that starts failing in a year or two. Sometimes faster.
Reality check: A poorly prepped surface might last 1 to 3 years. A properly prepped one? 7 to 10 years. Ain’t that a difference.
How to avoid it: Clean the walls. Sand glossy areas — yes, do actual sanding before painting. Use spackle for holes, caulk for seams. Lay down a drop cloth, take your time. Prep work decides everything.
How to fix it if it already happened: You don’t patch over it. You strip it back. Re-prep, start again. Not fun, but necessary.
Mistake #2: Skipping Primer or Using the Wrong One
Issue: Skipping primer before painting, or relying on “paint-and-primer-in-one” for everything. Which is a no go.
Why it happens: Marketing and impatience. Mostly impatience.
What goes wrong: Uneven coverage, stains bleeding through, weak adhesion. Especially on raw drywall or wood.
Where primer is non-negotiable: Bare drywall or wood, major color changes (dark to light, especially), stained or patched surfaces
Even brands like Sherwin-Williams or Benjamin Moore will tell you the same thing. Primer isn’t optional in those cases.
How to avoid it: Use the right primer for the surface. Not just any primer, specific matters here.
How to fix it if it already happened: If coverage looks uneven or stains show, you’ll need to reprime and repaint. There’s no shortcut. There never is.
Mistake #3: Choosing the Wrong Paint Type or Finish
This one’s subtle. But it shows up fast once the light hits.
Issue: Using the wrong paint sheen, or confusing interior vs exterior paint. Happens more than you’d think.
Why it happens: People pick color first, finish second. Sometimes not at all.
What goes wrong: Shiny finishes highlight every flaw. Flat finishes in high-traffic areas wear down too fast. Exterior paint used inside? Or the reverse? That’s a lifespan issue.
Here’s a quick paint finish guide:
- Flat/Matte: Ceilings, low-traffic areas
- Eggshell/Satin: Living rooms, hallways
- Semi-gloss: Kitchens, bathrooms, trim
And here’s the LA-specific thing — natural light here is aggressive. Strong. It exposes everything. High gloss on imperfect walls? You’ll see every ripple.
How to avoid it: Match the paint sheen to the room’s function and wall condition. Always.
How to fix it if it already happened: Recoat with the correct finish. Sometimes you’ll need light sanding first to tone down the previous layer.
Mistake #4: Poor Application Technique and Rushing Between Coats
This is where DIY confidence usually cracks a little.
Issue: Rushing. Overloading the roller, uneven strokes, ignoring timing.
Why it happens: People want it done in a day. Which rarely works.
What goes wrong:
- Drips and sags from too much paint
- Visible brush marks
- Lap lines from not maintaining a wet edge painting technique
- Peeling when layers don’t bond properly
And the big one — ignoring drying time between coats.
How to avoid it:
- Work in small sections. About 3×3 ft
- Keep a consistent wet edge
- Don’t overload the roller
- Remove painter’s tape while paint is slightly wet
And if you’re unsure about drying time between coats just wait for 24 hours. Seriously. It saves you from redoing everything.
How to fix it if it already happened: Light sanding, then recoat properly. Sometimes a full redo if the texture’s too uneven.
Mistake #5: Ignoring Conditions — Temperature, Humidity, and Lighting
This one catches people off guard. Because it’s invisible until it isn’t.
Problem: Painting in the wrong conditions — too hot, too humid, wrong time of day.
Why it happens: Weather feels secondary. It isn’t.
What goes wrong:
- Blistering in direct sunlight
- Bubbling during painting in humidity
- Uneven drying indoors with open windows
In LA, the sun moves fast and hits hard. Starting on a sun-exposed wall? That’s one of the most common house painting mistakes we usually see.
Also — lighting. A color sample can look completely different in morning vs evening natural light.
How to avoid it:
- Paint exterior surfaces in the shade, following the sun
- Avoid high humidity days
- Test colors in multiple lighting conditions
How to fix it if it already happened: If blistering occurs, sand it down and repaint under proper conditions. There’s no shortcut here either.
FAQ
What happens if you don’t use primer before painting?
You risk poor adhesion, uneven color, and stains bleeding through. The paint may fail much faster.
How long should you wait between coats of paint?
Typically 4 to6 hours, but when in doubt, wait 24 hours to ensure proper bonding between each coat.
Can you paint over old peeling paint without stripping it?
No. You need to remove peeling paint, prep the surface, then repaint.
What’s the best paint finish for a living room or bedroom?
Eggshell or satin finishes offer a balance of durability and a smooth finish.
When should you hire a professional painter instead of doing it yourself?
If the project involves large areas, damaged surfaces, or you want a truly long-lasting result, hiring a professional painter is worth it.