 Qyndarix Thalendros
There are many home fixtures that look simple but demand careful consideration before you actually fish out your wallet. The wrong wood, or support, or wall anchor can, in a matter of months, turn a nice shelf into something droopy or sagging. This guide takes you through everything you need to know, from wood varieties to price references, so you can make the wisest choice for your own living area.
What Kind of Wood Is Best for Wall Shelves?
The ideal wood for wall shelves depends on three elements: how much burden the shelf will bear, your spending limits, and the vibe you wish to have in your house.
- Oak stands as the most frequently bought variety for excellent reasons. It boasts rugged resilience, easy availability, takes on strains strongly, and endures hefty burdens like books or expensive cutlery. Red oak especially proves a good match for most people.
- Maple is slightly tougher than oak and thrives in bustling zones like kitchens. It features a silkier texture, making it a splendid pick if you intend to coat the shelf in paint.
- Pine emerges as the wallet-friendly choice. It feels gentler and more susceptible to nicks, yet remains ideal for light items like framed memories, small potted greenery, or ornamental decorations. Many folks gravitate toward pine for its earthy, cabin-inspired charm, particularly in living rooms and bedrooms.
- Walnut resides in the luxurious tier. It radiates a deep, velvety hue that complements sleek and vintage-modern living spaces splendidly, yet costs noticeably more money than oak or pine.
- Birch plywood needs a separate debate altogether. It isn’t hearty solid wood, yet it delivers unexpected strength and battles distortion better than many firm softwoods. For expansive shelves where sagging is a big threat, ¾-inch birch plywood proves to be a savvy and economical choice.
- Avoid MDF for wall shelves that must bear a genuinely heavy weight. MDF appears pristine when coated, but it absorbs a lot of dampness, slumps beneath pressure, and does not hold on to screws near edges. It suits feather-light ornamental items, but fails for anything heavier.
What Is the Best Wood for Shelves That Won’t Sag?
The most common complaint people have with wooden wall shelves is that they sag, and it usually comes down to two things: using the wrong type of wood or trying to span too wide a space without adding any support.
- Hard maple and red oak rank among the most unyielding and easily found wood types, and they are the best choice if sag concerns you. Their superior resistance to elasticity means they defy bowing under pressure far better than yielding woods.
- Baltic birch plywood at ¾ inch depth provides yet another robust contender for broad shelves. Thanks to its layered crisscross design, it defies curving along its breadth more effectively than solid softwoods of equivalent thickness.
A reasonable rule of thumb is to limit the span for shelves carrying significant weights to under 30 inches without mid-support. No matter the type of wood, every additional foot beyond that increases the likelihood of sagging. Shelf thickness is important, too: For weight-bearing shelves, ¾ inch is the starting point; 1 inch is ideal for spans exceeding 36 inches.
For small loads, pine shelves are enough, but if you want to store heavy books, electronics, or anything that weighs more than 20–25 pounds, it’s always best to upgrade to a strong hardwood or birch plywood.
Is It Cheaper to Build or Buy Shelves?
In most scenarios, crafting your own wooden wall shelves is usually remarkably lighter on the purse than buying readymade versions of similar quality.
A 36-inch solid pine shelf manufactured from raw lumber generally comes in at $15–$30 for materials used to make it. The same length in red oak could run up to $35–$60. Compare that against store-bought solid timber shelves, which frequently start at $60–$80 for plain designs and go beyond $150 for anything boasting a lavish finishing or floating hardware included.
The subtlety arises when you also take into consideration tools and effort. If you already possess a saw, drill, and sander, fashioning your own shelves becomes a lot easier. If you must buy or loan equipment, the savings aren’t that great. For one single shelf, grabbing ready-made could prove simpler and barely pricier.
Another factor is the quality of materials. Plenty of bargain store shelves, even those advertised as wood shelves, rely on MDF cores, thin veneers, or empty builds. When you build your own, you control all the materials. A handmade pine shelf stays true to solid pine; a $40 store shelf at the same tag might not be that honest.
Final decision: Building costs less and often offers better quality if you have the resources and time needed. Buying is ideal for simplicity, small quantities, or when you find a real wood shelf at a fair price.
Tips for Installing Wood Shelves on a Wall
If not properly attached, even the best shelf collapses. A few suggestions worth thinking about before you start drilling:
- Find the studs. Where it’s practical, fasten into wall studs instead of just drywall. Studs typically span 16 or 24 inches from one another. A stud finder speeds this up; if absent, knocking the wall and listening for firm versus echoey sounds does the trick in a pinch.
- Use the right anchors. Use toggle bolts or heavy-duty hollow-wall anchors rated for the load you want to apply on the shelf if your shelf spot won’t line up with studs. For anything beyond the lightest decorative racks, ordinary plastic drywall plugs fail.
- Level carefully. A shelf that sits even mildly askew looks warped over time and triggers objects to glide across it. Take extra time with a level before etching your bore marks; it saves headaches down the road.
- Match brackets to the load. For floating wooden wall shelves, concealed floating shelf fixtures perform admirably for lighter burdens and deliver a sleek silhouette. For weightier shelves, exposed L-brackets anchored into studs offer greater dependability and markedly superior strength.
Frequently Asked Questions
Q: Can I use pine for heavy wall shelves?
Smaller, lighter ornamental items use pine. Oak or maple would endure far longer if you often utilize anything heavy.
Q: How much weight can a wooden wall shelf hold?
For instance, a 3/4-inch oak shelf supported at its ends by screws into wall studs (on both sides of the shelf) will typically only hold between 50 and 80 pounds across a 2-foot span.
Q: What is the standard depth for wall shelves?
Most wall shelves have a depth of 8–12 inches. Books typically need 10–12 inches, while lovely ornamental shelves just need 6–8 inches.
Q: Do floating shelves hold as much as bracket shelves?
Not really. While decent floating gear can hold daily shelving well, the finest shelves for heavy-duty shelving are L-bracket shelves screwed into studs.
Q: How do I stop wooden wall shelves from wobbling?
The most often given cause of wobbling is that the anchors have slipped the studs or the hardware has become undone. Verify that screws are fastened and at least some anchors penetrate solid studs.
Q: Can wooden wall shelves be used in a bathroom?
Yes, but finish them right. Teak is inherently impervious to water; oak and pine need a waterproof covering or else they will distort in damp settings.
Q: How far apart should wall shelves be spaced?
Books normally have a 10–12 inch gap between shelves. Wider products always require more space, thus 12–15 inches is ideal for display or storage on shelves since it provides more flexibility to store taller objects.
How to Make Wall Shelves: A Step-by-Step Guide
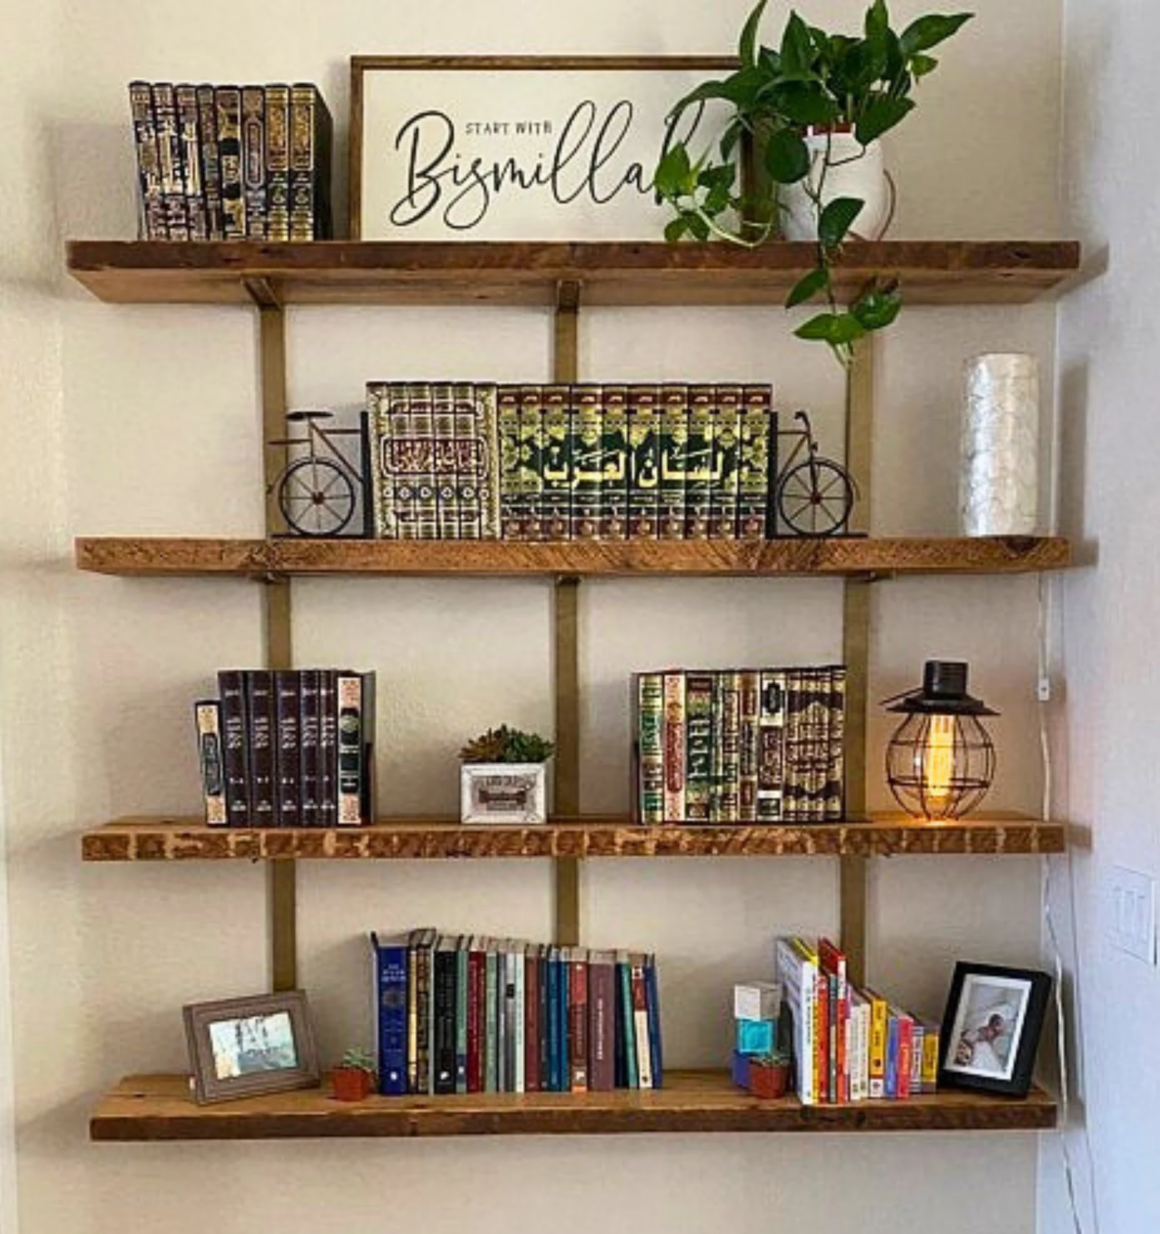
Wall-mounted shelves are a modern way to beautify your space in a simple and affordable manner. It can change the ambience of your space in an instant and give it a sleek look. You can use these in your living room, kitchen, bedroom and even your bathroom.
Along with their amazing appearance, they also serve the purpose of making your room highly organised. For your living room, you can choose floating shelves, storage shelves for your kitchen, and corner shelves for small spaces.
Fitting most kinds of shelving is a relatively simple project that almost everyone can conquer with some easy tools and planning. This guide walks you through the entire process in simple steps.
What Do You Need Before You Start Installing Wall Shelves?
Even though wall mounted shelves are easy to install, it is essential to know the kind of tools you will be needing and the appropriate materials for successfully completing this task. Have a look at these requirements.
Tools Required
In order to successfully install wall shelves, you will need some crucial tools to make the process quicker and smoother. Lets discuss these tools.
- Stud finder:
- Power drill
- Drill bits
- Level
- Measuring tape
- Pencil
- Screwdriver
- Wall anchors
- Sandpaper (if using unfinished wood)
Materials Needed
Materials are as important as tools when it comes to installing anything. Make sure you have all these so you can get started with the process as soon as possible. Have a quick look at these for a better understanding.
- Shelf board
- Shelf brackets or hidden shelf hardware
- Screws
- Wall plugs or toggle bolts
- Paint or wood stain (optional)
Step-by-Step Guide to Installing Wall Shelves
Having the right type of guidance is absolutely necessary to carry out all the steps of the installation process correctly. So, have a look at all the wall shelf installation steps.
Step 1: Choose the Shelf Style and Location
So before we get into it, you need to choose the type of shelf that fits based on one location where you are getting placed and others locally. Some of these options include:
- Floating shelves
- Bracket-mounted shelves
- Corner shelves
Choose a spot where you can maximise the use of your shelves with good utilisation and balance in the whole room. Make sure to mark exactly where you want them or the height wise from which place. They appear best positioned around eye level.
Step 2: Find the Wall Studs
Use a stud finder to locate the studs in your wall. Make sure you are training on shelves that can hold anything stronger than the average shelf is backed by a stud. With a pencil, make the stud very light scratch marks. If studs are not in places where you need your shelf to be, use strong, heavy-duty wall anchors or toggle bolts for drywall (use the strongest available).
Step 3: Mark the Bracket Positions
For the next phase, you will need to push the bracket against your wall and then use a level as well. With a pencil, mark down on where the screw holes are. Exercise caution with this step because any inaccurate and uneven markings will affect the shelf’s appearance.
Step 4: Drill Pilot Holes
Now it is time to drill out the conditionally large guide hole where you made your marks. Making pilot holes makes it easier for the screws to go in properly and minimizes any damage occurring to the wall. For those who are using wall anchors, drill holes according to the instructions that accompany these devices.
Step 5: Install the Brackets
At this step, you will have to place the brackets on top of the holes and fasten them with some screws. If too tight, they risk slipping and/or damaging the dry wall. If you are mounting floating shelves, carefully follow the directions to attach the brackets not visible next to your wall.
Step 6: Prepare the Shelf Board
Now it is time to prepare the shelf board. If you are working with unfinished wood:
- Sand the surface to make it smooth
- Use paint, stain, or wood finish
- Now let it dry fully
Pre-finished shelves are generally ready to go.
Step 7: Attach the Shelf
Place the shelf onto the brackets or slide it onto the hidden rods for floating shelves. Then secure it using the included screws if necessary. Use the level again to ensure everything is accurate.
Tips for Different Wall Types
Different walls require different installation techniques to ensure your fixtures are secure. Follow these simple guidelines for each wall type to avoid damage and get the best results.
Drywall
Use heavy-duty wall anchors if studs aren’t available. Locate studs for heavier items and avoid over-tightening to prevent damage.
Plaster Walls
Drill slowly to prevent cracks as plaster can chip or crack easily. Use a masonry bit for older plaster with lath and consider toggle bolts for heavier items.
Brick or Concrete Walls
Regular drills struggle with masonry so use a hammer drill. Install masonry anchors or sleeve anchors and place them precisely.
Tile Walls
Use a tile drill bit as standard bits can crack tiles. Apply gentle, consistent pressure and cool the bit if needed.
Final Thoughts
Installing wall shelves is a practical DIY project that can improve both storage and room design. With the right tools, careful measurements, and proper hardware, you can create strong and stylish shelves that last for years.
Take your time during installation, always use a level, and choose the correct mounting method for your wall type.
DIY wall shelves are also a real practical project as you can make both storage and home decor. Pair this with the right tools, measure cautiously and egalitarian hardware (in addition to), giant, pretty cabinets last for years.
Install with patience, level everything and pick the right installation method for your wall.
Frequently Asked Questions
How much weight can wall shelves hold?
Shelves that are directly installed into studs, typically will hold a higher weight capacity than shelves supported by only drywall anchors. And make sure you’re using brackets and hardware that are up to the weight rating, too.
Can I install shelves without studs?
Yes but with mounting anchors or toggle bolts for proper support. Otherwise, they may not hold the weight.
What type of wood is best for shelves?
Solid wood is both durable and attractive. MDF and plywood are other common and extremely inexpensive choices for shelves.
Are floating shelves strong?
Yes. Floating shelves are usually strong when installed correctly using high-quality mounting hardware.
What is the best shelf style for small rooms?
Corner shelves and floating shelves are great for saving space in smaller rooms.